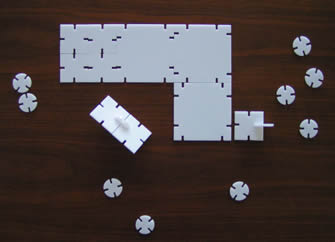
The first image shows the ideal situation of the kit of parts. This did not work in practice since the pieces that were intended to provide an angle joint broke at the slightest pressure.


At this point I realize the assembly was beginning to get very strong and not every joint needed to be fastened with the round pieces. This was great news since I had snapped a few while figuring out the best way to build the display case.
Aside from the fact that the pieces intended to create angles were too thin to withstand the twisting motion of the assembly, I realized human motion is not at all linear. I realized this most clearly when I noticed that I broke the most pieces whenever I tried to separate them, especially if I was in a hurry to do so and not thinking to move only as straight as possible.

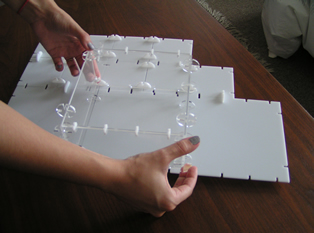
Once the assembly began to get larger, I noticed it was better to plan out modules and then attach them to each other, rather than try to assemble the whole thing at once.

Remember to put the ducks inside the display case!

Then attach the display modules to the rest of the assembly.

The materials I used were one sheet of white, .125in plexi and clear, .125 plexi. For the design and drafting of the file, I used Rhino v4 and used a .01 offset on the curves in order to account for the laser kerf and make the pieces fit tightly together. I used the Universal laser cutter to make the cuts with PPI @1000, power @60% and speed @2.5%. The slower speed produced very smooth edges, which made the pieces nicer to the touch.
rhino file
universal laser settings file
Use gloves when working with plexi, especially if you don't really know what is the strength of the assembly you are working with.
Test the connections between pieces extensively. I did not do this as exhaustively as I should have and I cut the majority of the model after only a few tests. This yielded pieces that only fit together in one way, which made the assembly process rather slow. This obviously defeats the purpose of a system that is supposed to be quick and easy to design and assemble.
Consider another material that is not as brittle or as heavy as plexi since these are the two characteristics that make it less practical for storage, transport and longevity.